How to Photograph Bakery and Pastry Items on a Phone (2026): Croissants, Donuts, Cakes, and Crumb That Looks Fresh
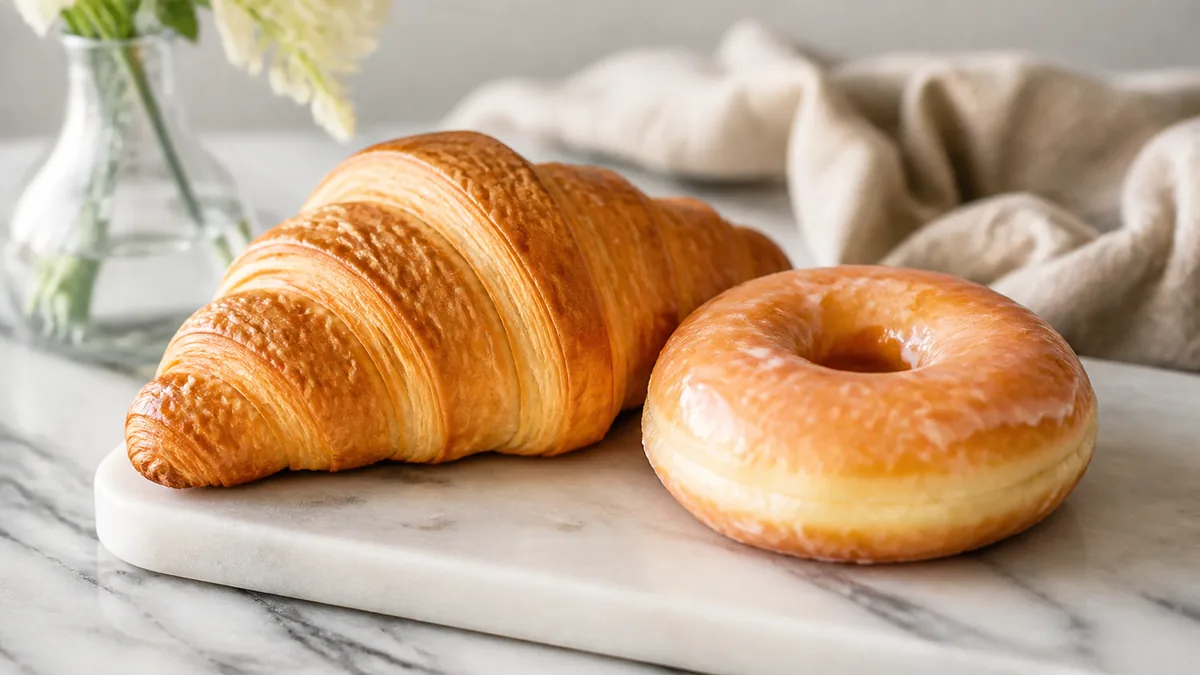
In 2026, your bakery photos are not marketing. They are your display case. Customers decide what to buy on Google Maps, Instagram, online ordering, and delivery apps before they ever walk in, which means bakery and pastry photography on a phone is now one of the highest-leverage things a bakery can do. If your pastry photos look dull, messy, or inconsistent, you lose impulse sales you never see. This guide is the repeatable phone workflow that actually works: clean light, clean backgrounds, honest texture, and a shot list you can run every week.
The fast version
- Side light plus a bounce card makes pastry texture look fresh and edible.
- Control glare on glaze by changing the angle, not by heavy editing.
- Shoot three frames per item: hero, close texture, and (when it matters) a cross-section.
- If you shoot behind glass, kill reflections and fingerprints first.
- Export crop-safe versions once so menu thumbnails do not chop your product in half.
Why consistency sells more pastries than fancy props
Customers buy bakery items the way they buy products online: they scroll, compare, and decide fast. That makes thumbnails matter more than ever, and it makes consistency read as premium. If your croissant, your cake, and your cookie all look like they were shot in three different rooms, the menu feels unreliable, and an unreliable-looking menu slows orders.
The goal is not a fashion shoot. The goal is clarity and a unified look. If you want the full consistency system, our restaurant photo style guide walks through locking a background, a light direction, and a default angle so every item looks like one brand.
The pastry photo station (simple and repeatable)
You do not need a studio. You need control over a small set of variables.
The station
- One key light from the side (a window or a soft LED).
- One white bounce card opposite the light to lift shadows.
- One matte, neutral background board.
- A small tripod (optional, but it speeds up consistency).
- A microfiber cloth for fingerprints and crumbs.
The background rule
If the background competes with the pastry, the pastry loses. Pick one background and stay with it. Variety inside a single menu reads as chaos; one clean surface reads as a brand.
The three shots that sell each pastry
Standardizing your shot list is what turns a slow shoot into a fast, repeatable sprint.
- Hero listing shot. The pastry is the product. Clean background, crop-safe framing, dish filling most of the frame.
- Close texture shot. Flaky layers, sugar crust, glaze, filling. This is your social and promo frame.
- Cross-section. For croissants, cakes, filled donuts, and stuffed pastries, a clean slice is freshness proof that drives orders.
Do these three consistently and your menu instantly looks intentional.
Shooting behind glass without looking cheap
Display-case photos fail for three predictable reasons: reflections, fingerprints, and mixed lighting. Run this quick checklist:
- Wipe the glass inside and out.
- Turn off overhead lights that throw harsh reflections.
- Move the phone slightly off-axis so you do not reflect your own face.
- Shoot the brightest, cleanest section of the case.
- Never shoot through condensation or fog.
When you can, pull the item out and shoot it on your station. Station shots almost always convert better than case shots because you control the light and the background.
The freshness cues customers actually look for
Bakery customers buy on visual cues: crisp edges, flaky layers, a glossy-but-clean glaze, and crumb that looks soft. Your photo’s only job is to make those cues obvious.
- Use side light to create the micro-shadows that reveal texture.
- Shoot one tight texture frame per item.
- Add a cross-section for anything filled or layered.
This is clarity, not styling. You are showing the product honestly, just lit well.
Item-by-item tips
Croissants
Show the lamination. Use side light to bring out the layers, shoot at about 45 degrees, and add a cross-section when possible. Avoid flat overhead light that hides the layers and avoid heavy sharpening that makes the layers look fake.
Donuts
Aim for glossy without glare. Rotate the donut until the glare lines break up, raise the light angle slightly, and keep toppings clean and intentional. Do not stage drips you do not actually serve.
Cakes
Show height and interior. A clean slice that reveals the crumb sells the cake more than the whole-cake hero. Keep frosting edges neat, use a plate that does not distract, and watch for a yellow cast on white frosting, which reads as stale.
Cookies, bars, and loaves
Side light reveals crisp edges and crumb. Stack two or three pieces for height, and keep props minimal. For bread, shoot one hero loaf and one clean slice to show both crust and soft interior, and keep the board tidy.
A 75-minute bakery photo sprint
A realistic, repeatable schedule beats an occasional all-day shoot.
| Phase | Time | What you do |
|---|---|---|
| Setup | 15 min | Background and light, wipe plates and boards, pick 10 top sellers, decide which need cross-sections. |
| Shoot | 45 min | 6–10 frames per item, cross-sections for filled goods, one tray assortment, one packaging shot. |
| Publish | 15 min | Enhance, export, upload to menu and Google, schedule one social post. |
If you want to make this a habit, the weekly restaurant photo sprint turns it into a recurring 60-minute loop.
Export and crop so pastries do not get ruined
Pastries are usually small in thumbnails, so a loose crop turns a beautiful danish into an unrecognizable blob. Run the thumbnail test on every frame: zoom out until the image is tiny. If you cannot tell what it is, crop tighter, reduce background space, and choose a simpler angle. Export the platform crops you need once instead of re-cropping forever.
Honest enhancement (what to fix and what to leave alone)
Where a phone falls short is lighting and color: warm overhead lights tint whites yellow, glaze loses its gloss, and crumb goes muddy. That is exactly the gap FoodPhoto.ai is built to close. It takes a real photo of your real pastry and corrects lighting, background, color, and gloss without changing the product. You can clean up an entire tray of items in minutes for a few cents each instead of booking a studio. Keep it honest: enhance clarity and light, never invent toppings, fillings, or steam you do not serve.
For bundles and catering boxes, which often outperform single-item photos because they answer “what do I get,” pair this workflow with our catering and family meal photo guide.
The bakery QA checklist
Before you publish, confirm:
- You can identify the item at thumbnail size.
- Whites are neutral, not yellow or green.
- Glaze shine is controlled, with no harsh glare stripe.
- Plate edges and background are clean.
- The photo matches what you actually serve.
If any answer is no, it is usually a 60-second fix: a cleaner plate, a better light angle, or a tighter crop.
Run this workflow for two weeks and your online menu will start selling like your in-store display case. Try it on your five best sellers and compare the before and after — that is usually all it takes to make pastry photos a habit instead of a chore. See pricing when you are ready to keep the cadence going.
Frequently asked questions
Do you need a DSLR for good bakery pastry photography?
No. A consistent station and good side light beat random gear upgrades. A modern phone shoots more than enough resolution for menus, Google Business Profile, and delivery apps. The variables that actually matter are light direction, a clean background, and a crop that reads at thumbnail size.
How do I stop glare on glazed donuts and pastries?
Rotate the pastry or shift the light angle slightly until the glare stripe breaks up. Glaze and chocolate are mirrors, so you fix shine by changing geometry, not by editing it out. A small bounce card on the shadow side keeps the gloss looking rich instead of washed out.
How do I take photos of pastries behind display glass?
Wipe the glass inside and out, turn off harsh overhead lights that reflect, shoot slightly off-axis so your reflection disappears, and pick the brightest, cleanest section of the case. Whenever possible, remove the item and shoot it on your station instead, since station shots convert better than case shots.
How often should a bakery update its pastry photos?
Refresh core items monthly and shoot specials or seasonal items weekly. A short weekly sprint keeps your online menu feeling as fresh as your in-store case without turning photography into a full-time job.