How to Photograph Salads and Bowls on a Phone (So They Look Fresh)
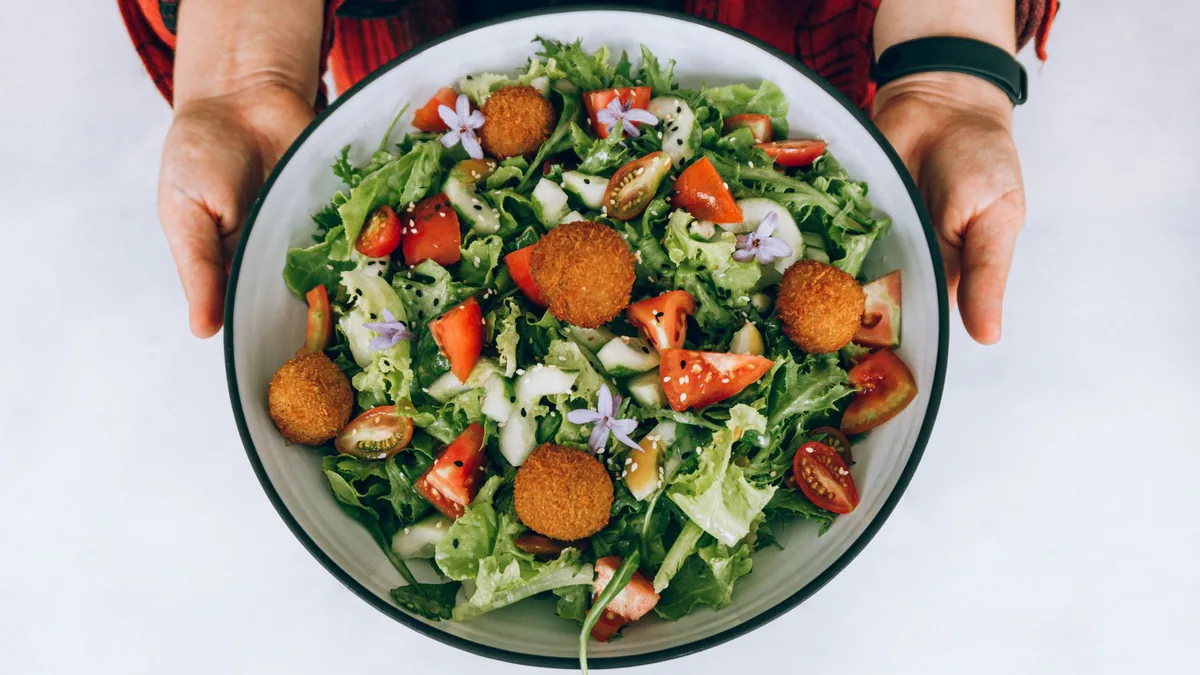
Salads and bowls are some of the most photogenic items on a menu — and some of the most commonly ruined. Learning how to photograph salads and bowls on a phone comes down to fixing three things that flatten them: dull lighting that drains the greens, dressing glare, and a messy pile where the toppings blend together. Get the light direction, the dressing, and the angle right and a simple grain bowl looks fresh, colorful, and instantly orderable. This checklist gets you there without a studio.
The salad problem: flat and brown
Most salad photos fail for the same reasons, and they’re all fixable:
- Overhead kitchen lighting turns vibrant greens dull and shifts the color.
- Dressing creates harsh glare or makes the greens look soggy.
- Toppings blend together into an indistinct pile, so nothing stands out.
The result is a “sad salad” — technically the right food, but visually unappetizing. Fix the light, control the dressing, and arrange the toppings, and the same bowl transforms.
The setup that fixes 80% of it
You need directional, soft light and a clean frame. That’s it.
- Side window light, or one soft continuous light placed to the side. Side light is what reveals the texture and dimensionality of a bowl — overhead light flattens it.
- A neutral background so the colorful food is the hero.
- A white reflector (even a sheet of paper or foam board) opposite the light to lift shadows and keep the whole bowl readable.
And critically: turn off mixed overhead lights if they shift the color. Most kitchen lighting pushes food yellow or green, which is exactly what makes salads look tired. One clean light source beats five competing ones.
The bowl checklist (before you shoot)
Run this quick check before every shot. It’s the styling layer that makes the lighting work:
- Greens look crisp, not wilted. Keep them cold and dress them at the last moment.
- Proteins and toppings are visible, placed on top, not buried in the mix.
- Dressing is controlled — a light drizzle, never a puddle.
- The rim of the bowl is clean — wipe drips and smears every time.
A clean rim and visible hero toppings do more for a salad photo than any filter. For the full styling system, see the food styling rules for beginners.
Best angles for bowls
Bowls have two reliable angles, and the right one depends on what you want to show.
| Angle | Best for | Notes |
|---|---|---|
| Overhead (top-down) | Ingredient variety | Shows everything in the bowl at once; great for colorful grain and poke bowls |
| High 45 degrees | Depth and height | Adds dimension; good when the bowl is tall or layered |
Shoot both, then pick the one that reads best as a thumbnail. Don’t decide on the big screen — most ordering happens on phones, so the version that’s clearest at tiny size is the version that converts.
Shoot for the thumbnail
A bowl that looks gorgeous full-screen can turn into a confusing green blob at delivery-app thumbnail size. Run the thumbnail test on every shot: shrink it down until it’s tile-sized and ask whether you can still tell what it is and whether it still looks fresh. If not, get closer, simplify the toppings, or switch angles. For the exact crops each platform needs, see the delivery app photo guidelines and image sizes.
Make it menu-ready
Once you have a clean, well-lit master shot, you only need one image to feed every surface — export a square crop for delivery thumbnails, a 3:2 for item pages, and a 4:5 or 9:16 for social. Working from a single master keeps the whole menu consistent.
The step that slows most teams down is the editing: greens that still look a little dull after a phone shot, a background that’s slightly cluttered, or crops that need to be cut by hand for each platform. FoodPhoto.ai handles that from a real phone photo of your real bowl — it lifts the lighting so greens read fresh, cleans the background, and exports menu-ready crops in minutes, without changing the food. You can run one of your salads through a Menu Test Pack to see the before/after.
Keep it honest
Salads sell on freshness, and freshness only works if it’s real. Enhance the light, color balance, and crop — never add ingredients or inflate the portion. A bowl that looks vivid and matches what arrives earns trust and repeat orders; one that oversells earns complaints. Once your salad photos are working, the same weekly routine powers your other channels — see how to turn better photos into more delivery orders.
Build the bowl in shooting order
The order you assemble a bowl matters as much as the camera work, because freshness is a timer. Build it to be photographed, not just plated:
- Base first. Greens or grains, fluffed and filling the bowl so there’s no empty space showing.
- Structure next. Group ingredients in clean sections or quadrants rather than tossing everything together — separation reads as variety and care.
- Hero toppings on top. Place proteins and the most colorful elements where they’re visible, not buried.
- Dress and garnish last, right before the shot. A light drizzle and a final herb or seed scatter at the last second keeps everything looking just-made.
Shoot within a minute or two of finishing. Dressed greens wilt and grains dry out fast, so the gap between plating and shooting is the difference between fresh and tired.
Color is the whole game
Salads and bowls sell on color more than any other category. A bowl with intentional color contrast — deep greens against bright tomato, orange carrot, purple cabbage, golden grain — reads as fresh and healthy at a glance, even as a tiny thumbnail. When you plan a shoot, choose dishes and arrangements that maximize contrast, and avoid letting similar colors blend into a single muddy mass. A handful of bright accents placed on top can transform an otherwise green bowl into something that pops on a delivery rail.
Quick-fix table: salad photo problems and solutions
When a bowl shot isn’t working, the cause is almost always one of a handful of things. Use this as a fast diagnostic at the station:
| Problem | Likely cause | Fix |
|---|---|---|
| Greens look dull or grey | Overhead kitchen light shifting color | Switch to one directional side light; kill the ceiling fluorescents |
| Dressing glares or pools | Over-dressed or dressed too early | Light drizzle, last second; rotate bowl so shine moves off the hero |
| Everything blends together | Tossed instead of arranged | Group toppings in sections; place hero items on top |
| Looks tired/wilted | Gap between plating and shooting | Shoot within 1-2 minutes; keep greens cold until the last moment |
| Unreadable as a thumbnail | Too busy or too far away | Get closer, simplify, run the thumbnail test before publishing |
Most “bad salad photo” complaints trace back to one of these five rows. Fix the row, not the whole setup.
Common mistakes to avoid
A few specific traps catch restaurants again and again with bowls:
- Filling the bowl to the brim. An overpacked bowl loses its shape and the toppings tumble. Leave a little structure so the eye can read individual ingredients.
- Using a dark bowl for a dark salad. Low contrast between the vessel and the food flattens everything. A neutral or light bowl lets greens and grains pop.
- Garnishing the whole surface evenly. A deliberate cluster of herbs or seeds in one area reads as intentional; a uniform sprinkle reads as filler.
- Forgetting the dressing-on-the-side option. For delivery especially, a small visible cup of dressing beside a crisp, undressed bowl often photographs fresher and matches how the dish actually travels.
Why salads reward consistency
Salads and bowls turn over fast on a menu — new grains, seasonal produce, rotating proteins — which makes them one of the highest-churn categories to keep photographed. That’s exactly why a repeatable setup pays off here more than anywhere: the same side light, the same neutral bowl, the same angle, and the same enhancement step mean a new seasonal bowl drops straight into your existing menu without looking like it came from a different restaurant. If you run seasonal produce, pair this with our guide on updating menu photos by season without a full reshoot.
Fresh salad and bowl photos come down to directional side light, crisp just-dressed greens, controlled dressing, and an angle that reads at thumbnail size. Nail those and even a simple bowl looks craveable. When you’re ready to make the enhance-and-export step fast, start with a $10 Menu Test Pack on the pricing page — 10 credits to test, with plans from $15/month and credits that roll over.
Need consistent menu photos without a full reshoot? Start with real dish photos and improve lighting, background, and platform-ready crops in the FoodPhoto.ai studio.
FAQ
How do I photograph salads so they look fresh, not flat?
Flat, dull salad photos come from overhead kitchen lighting that drains color. Use directional side light from a window or one soft light, keep greens crisp and just-dressed, and add a white reflector to lift shadows. Side light brings out texture and makes greens read as vibrant rather than wilted.
What's the best angle for photographing a bowl?
Two angles cover almost every bowl: straight overhead, which is best for showing ingredient variety, and a high 45 degrees, which adds depth and height. Shoot both, then pick whichever reads more clearly as a small thumbnail on a phone.
How do I stop dressing from causing glare in salad photos?
Dress lightly and just before shooting — puddles and over-dressing create glare and make greens look soggy. Diffuse your light so highlights are soft, and rotate the bowl until any shine moves off the hero area. A light drizzle reads as fresh; a pool reads as messy.
Why do my salad photos look dull and brown?
Usually two causes: mixed overhead lighting that shifts the color, and greens that have wilted or been dressed too early. Turn off color-shifting overheads, use a single directional light source, keep greens cold and crisp until the last moment, and the color comes back.