

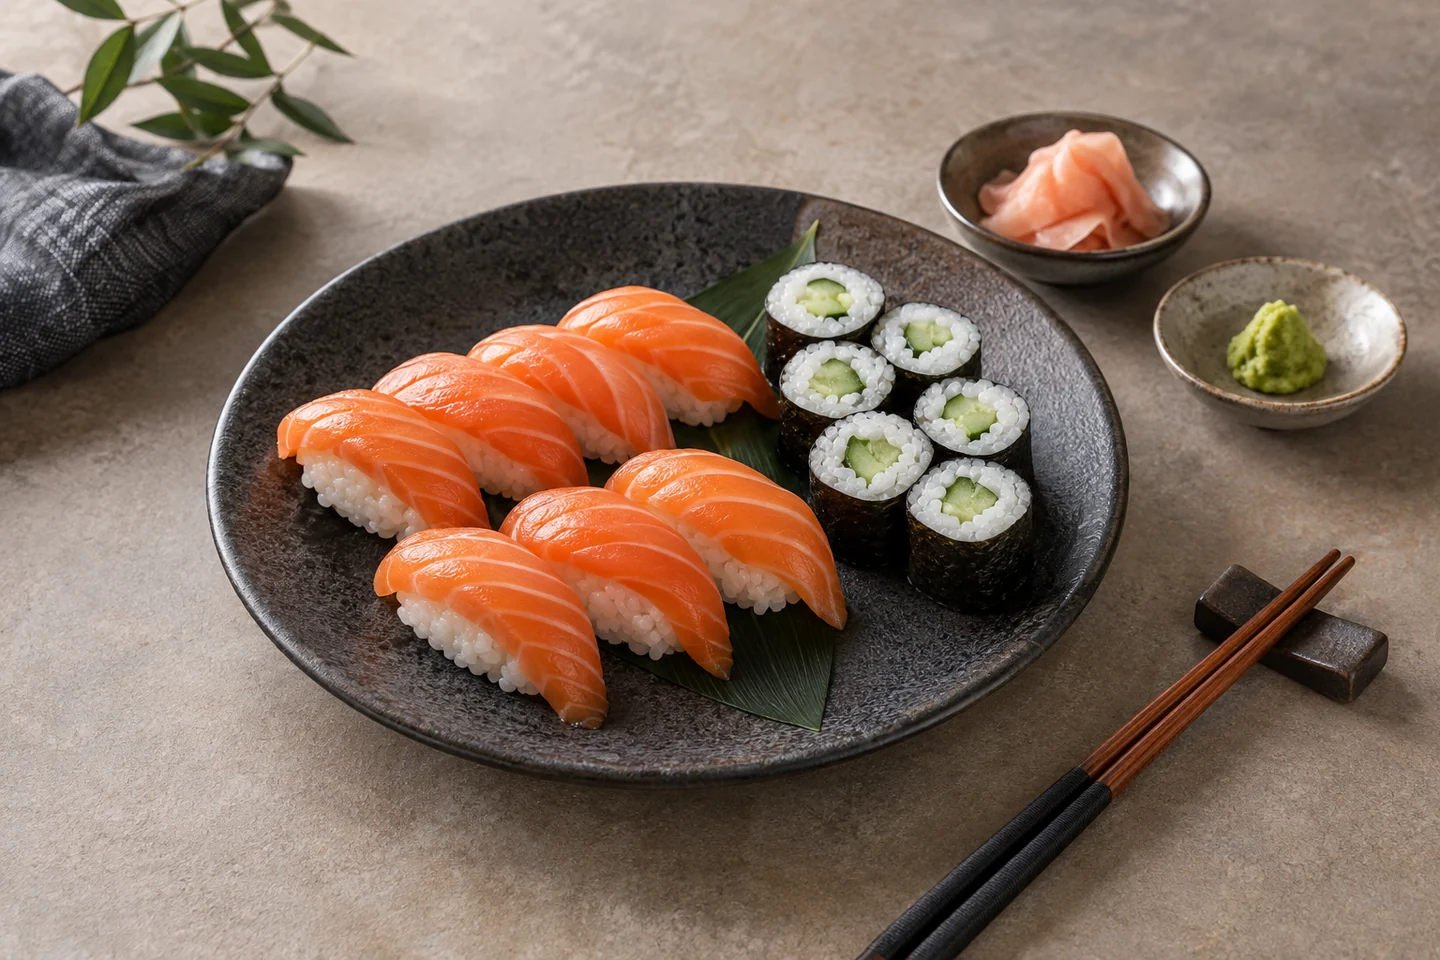
The fastest reliable sushi-photography setup is one soft side light, a white bounce card, a 30–45° camera angle for nigiri and rolls, and a neutral rice check before every shot. Use overhead only when the arrangement—such as a platter, poke bowl, or chirashi—is the main subject. The goal is accurate fish color, visible rice texture, controlled shine, and an honest portion that still reads in a small menu thumbnail.
Reviewed and updated: August 19, 2026.
This 2026 guide is for restaurant operators, menu photographers, and creators shooting sushi with a phone or camera. It combines the useful material from FoodPhoto.ai’s previous sushi articles into one maintained resource. If you already have a real dish photo, you can improve its lighting, background, and crop in the FoodPhoto.ai web studio without changing the food. Compare every result with the original and reject any change to ingredients or portion.
The short answer: how to photograph sushi
- Turn off mixed kitchen lights. Use one window or one soft LED source from the side.
- Place a white card opposite the light. It opens the shadows without flattening the rice.
- Shoot nigiri and rolls at 30–45°. This shows both the topping and the rice structure.
- Use overhead for full sets and bowls. Make the count and variety immediately clear.
- Check the rice before the fish. Neutral, detailed rice is the quickest warning for bad white balance or exposure.
- Rotate the plate to control glare. Fix reflections in the scene before trying to edit them away.
- Export for the destination. Keep a square thumbnail crop and a wider website hero rather than forcing one crop everywhere.
Why sushi is difficult to photograph
Sushi exposes small mistakes. Fish changes character with a slight green, yellow, or magenta cast. White rice can turn gray when underexposed or yellow under warm light. Nori absorbs light while glaze, roe, and oily fish reflect it. A single frame therefore has bright highlights, deep dark areas, pale rice, and color-sensitive ingredients.
That is why global edits often fail. Raising saturation to rescue tuna can make salmon artificial. Cooling the whole frame to correct warm rice can push the fish blue. Start with clean light, then make small corrections that preserve the real dish.
A simple sushi photo station
Light
Use one large, soft source about 45° to the side of the plate. Window light through a sheer curtain works; so does a diffused LED panel. Put a white foam board or card on the opposite side as fill. Move the card closer for softer shadows and farther away when the image becomes too flat.
Avoid direct overhead light for individual nigiri. It removes the small shadows between rice grains and can turn the base into a smooth white shape. Also avoid mixing daylight, warm pendants, and fluorescent kitchen light in the same exposure.
Background and props
Use a clean matte surface: pale stone, neutral wood, off-white, or a dark low-gloss surface for a more editorial set. Keep props subordinate to the food. A small amount of ginger, wasabi, soy, or one pair of chopsticks can provide context; a crowded table competes with the pieces and makes delivery thumbnails hard to read.
Phone or camera position
Keep the lens far enough away to avoid wide-angle distortion, then crop. On a phone, the standard lens is usually safer than an ultra-wide lens. Stabilize the device with a stand or rest your elbows before taking several frames. Focus on the front hero piece for angled shots and on the center plane for overhead platters.
Best angle by sushi type
| Item | Starting angle | What the image must show |
|---|---|---|
| Nigiri | 30–40° | Fish surface, rice grain, topping-to-rice proportion |
| Maki and uramaki | 45–70° | Cross-section, height, nori edge, top garnish |
| Sashimi | 45° or overhead | Slice texture, cut consistency, arrangement |
| Chirashi and poke | Overhead | Ingredient mix, bowl coverage, honest portion |
| Combination platter | Overhead plus one low hero | Total count first; premium pieces second |
Treat these as starting positions, not universal rules. Plate height, box depth, garnish, and the destination crop can change the best angle. Make one controlled adjustment at a time and compare the thumbnails, not only the full-size photos.
The rice test for color and texture
Rice is a practical reference because it should remain close to neutral while retaining individual grains.
- Yellow rice: the scene is too warm or includes mixed lighting.
- Blue rice: the white balance is too cool.
- Gray rice: the exposure is low, the shadows are heavy, or the background is reflecting a cast.
- Smooth, featureless rice: the light is too frontal or overhead, focus missed, or processing removed texture.
Correct the scene before increasing saturation. When the rice is believable, fish color is much easier to judge.
Control shine without making fish look plastic
Fresh fish, roe, and glaze need some highlight, but a hard white streak can hide texture. Rotate the plate a few degrees, raise or lower the light, or increase diffusion until the highlight becomes broad and soft. A reflector can then restore detail on the dark side.
In editing, reduce only distracting highlights. Do not remove every reflection: completely matte fish also looks unnatural. Avoid aggressive texture, clarity, or saturation settings that create halos around rice grains and nori.
Sushi photos for delivery menus
A delivery image has to work small. Start by showing what the customer receives: the number of pieces, the mix of rolls, and the container or plate boundaries. Do not hide pieces behind one oversized hero item or use a crop that suggests a larger portion.
For each important set, capture:
- a clean square or near-square overview for menu listings;
- a wider hero for the restaurant website or campaign;
- one close detail only when it adds useful texture or premium-product information.
Platform requirements change, so confirm the current upload dimensions and crop behavior for the specific marketplace before exporting. The FoodPhoto.ai platform guides organize those destination-specific checks.
An honest AI-editing workflow
Copyable sushi edit brief: “Use my uploaded photo as the source. Neutralize the yellow cast in the rice, soften the glare on the salmon, and simplify only the background. Keep all 12 pieces, fish type, toppings, rice shape, plate and portion exactly as photographed. Leave enough space for a square menu crop. If a detail cannot be preserved, tell me instead of replacing it.”
Run the edit on your own sushi photo in the AI food photo editor. Compare the result with the source side by side before publishing. The illustration above shows a possible lighting and framing target; it is not a tested customer edit.
AI is useful when it improves presentation while preserving the photographed product. A safe sushi workflow can correct exposure and white balance, clean a distracting background, soften glare, and prepare alternate crops. It should not repaint fish, add ingredients, increase the piece count, change the cut, or invent a different plating arrangement.
- Upload the real menu photo to the FoodPhoto.ai studio.
- Choose a clean treatment that fits the restaurant’s existing visual style.
- Compare rice color, fish markings, piece count, and garnish against the original.
- Reject any result that changes the actual dish.
- Export the approved image for the intended menu placement.
For the product workflow and examples, see the AI sushi menu-photo service page. For credit options, see FoodPhoto.ai pricing.
Pre-publish sushi photo checklist
- The rice is neutral and individual grains remain visible.
- The fish resembles the real item rather than an oversaturated version.
- Highlights show freshness without blocking texture.
- Nori retains detail instead of becoming a solid black shape.
- The piece count and portion are honest.
- The focal item remains obvious at thumbnail size.
- The crop leaves enough room for the destination interface.
- No generated ingredient, garnish, utensil, or plate change slipped into the edit.
Frequently asked questions
What is the best angle for sushi photography?
Start at 30–45° for nigiri and rolls because it shows the topping, height, and rice. Use overhead for combination platters, chirashi, and poke when the arrangement and portion are the main information.
How do I photograph sushi on a phone?
Use the phone’s standard lens, one soft side light, and a white card opposite the light. Turn off mixed kitchen lighting, move back enough to avoid wide-angle distortion, focus on the hero piece, and check that the rice is neutral before shooting the full set.
Why does sushi look yellow or green in photos?
Mixed light sources are the usual cause. Warm fixtures, fluorescent lights, and daylight can create different color casts in one frame. Turn off competing fixtures and use one controlled source before correcting white balance.
Can AI improve a sushi photo without making it fake?
Yes, if the edit preserves the real dish. Appropriate changes include lighting correction, background cleanup, glare control, and crop preparation. Piece count, fish type, ingredients, portion, and plating should remain unchanged.
What should a sushi delivery photo show?
It should show the complete portion, piece count, variety, and container clearly at thumbnail size. Use a clean overview as the primary menu image and reserve close details for secondary gallery images.
Ready to improve a real menu photo? Open the FoodPhoto.ai web studio, upload one sushi image, and verify the result against the checklist above.


