The skill behind a great food photo was never the camera — it was the brief. A working photographer specifies the dish, the light, the lens, the styling, and the mood before a single frame is shot. That same brief translates almost directly into AI food photography prompts. The trade vocabulary that made photographers efficient is exactly the vocabulary that makes AI image direction efficient. This guide gives you the prompt patterns, the levers behind them, and an honest account of the limits.
One framing up front: for a real menu, the goal isn’t to invent food from text. It’s to direct the look of your real dish. We’ll come back to why that distinction matters.
Why a real brief beats a clever prompt
Most weak AI food images start with something like "professional photo of pasta, beautiful lighting, restaurant quality." That isn’t a brief — it’s a wish. A real photographer’s brief specifies six things, in order:
- Subject and state (the dish and how it looks — steaming, just-plated, glossy)
- Lighting (direction, hardness, color)
- Camera POV (angle)
- Lens character (focal length and aperture)
- Styling (surface, props, garnish)
- Mood / color grade
Skip any one and the model fills the gap with its training-data average — which is why so much generic AI food looks like dated stock photography. The pattern that works mirrors a paper brief:
[dish + state],[lighting],[camera POV],[lens character],[styling],[color grade/mood].
Every template below is a variation on that line.
Lighting: the language the model understands
Photographers think in three lights — key (main), fill (softens shadows), and rim (separates subject from background). Image models know these terms because they were trained on captioned photos that use them.
Key-light phrasing that works:
- "soft window light from camera left, late afternoon" — warm and flattering
- "single overhead softbox, broad and diffused" — clean and commercial
- "low-angle warm tungsten light" — moody restaurant interior
- "open shade on an overcast day, cool and even" — bright cookbook look
Fill and rim:
- "subtle silver fill from camera right" — softens shadows without flattening
- "rim light kissing the edge of the plate from behind" — makes food read three-dimensional
- "negative fill, deep shadow on one side" — dramatic, low-key
Anti-pattern: "studio lighting" by itself. The model averages every studio it has seen and gives you nothing specific. Always name direction, hardness, and color.
Camera POV: three angles that sell food
| Angle | Prompt phrasing | Best for |
|---|---|---|
| Top-down (90°) | "directly overhead, perfectly flat" | Pizza, grain bowls, charcuterie |
| Three-quarter (45°) | "45-degree angle, shallow depth of field" | Pasta, sandwiches, most plates |
| Hero / eye-level | "eye-level hero shot, slight upward tilt" | Burgers, layered drinks, stacks |
Models drift toward 45° because it’s the median in their training data. If you want overhead or eye-level, insist on it — sometimes twice in the same prompt.
Lens character: focal length is a personality
- 35mm — wider, contextual, includes the table or room.
- 50mm — neutral, "what your eyes see," good for editorial.
- 85mm — flattering compression and creamy blur; the default for hero plates.
- 100mm macro — droplets, crumbs, texture; use sparingly.
Pair the focal length with an aperture: "shot on an 85mm lens at f/2.2" tells the model both compression and depth of field. Leave the aperture off and the blur becomes unpredictable.
Prompt templates you can fork
Replace the bracketed variables.
1. Editorial hero (the safe default)
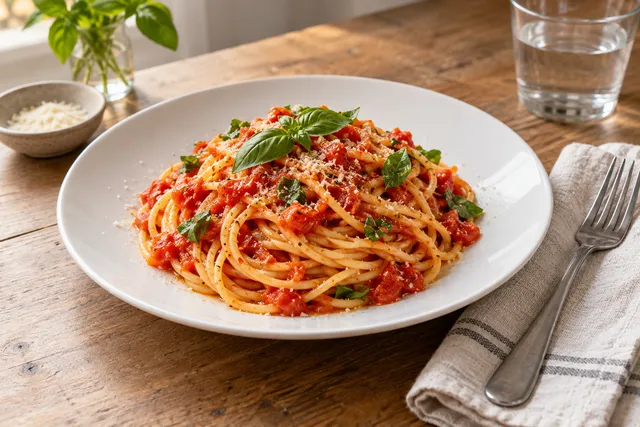
[dish],[2-3 styling details], soft window light from camera left, 45-degree angle, 85mm lens at f/2.2, shallow depth of field, warm grade, matte ceramic plate.
2. Top-down flat-lay
Overhead flat-lay of
[dish], perfectly 90 degrees, soft diffused daylight, 50mm at f/4,[3-4 ingredient props], dark slate surface, moody grade.
3. Menu hero (print-ready)
[dish]on[plate], eye-level hero shot, single overhead softbox, 50mm at f/3.5, clean white background, neutral grade, no props, sharp throughout.
4. Steam and motion
[hot dish]with visible steam, side light from camera right, 85mm at f/2, dark low-key background, just-plated, cinematic grade.
5. Cold drink with condensation
[drink]in[glass], beads of condensation, backlit rim light, 100mm macro at f/2.8, ice catching light, cool grade.
6. Rustic / farm-to-table
[dish]on weathered wood, window light through a sheer curtain, 35mm at f/2.8, slightly elevated angle, herb sprig, natural crumbs, warm desaturated grade.
7. Fine dining minimal
[dish]plated minimally, single hard light above-left, 85mm at f/2.5, deep black background, negative fill, cool desaturated grade.
8. Comfort / homestyle
[dish]in stoneware or cast iron, soft overhead window light, 50mm at f/3.2, butter glistening, hand-torn bread beside, warm faded grade.
9. Bright and airy (cafe/wellness)
[dish], natural light through a large window, 50mm at f/3.5, low 30-degree angle, pale ceramics, slightly overexposed, airy pastel grade.
10. Dark and moody
[dish], single rim light from behind, deep shadows on black slate, 85mm at f/1.8, 45-degree angle, low-key chiaroscuro grade.
Save these, fork them, and stop reinventing a brief for every dish.
Styling cues the model honors — and the ones it mangles
Honors: linen, marble, slate, weathered wood, stoneware, matte ceramic; crumbs, drips, herb sprigs, salt flakes; steam, condensation, glistening oil. These are physical states and surfaces the model has seen countless times.
Mangles or ignores: brand names and any text (renders as a broken blob), and exact garnish counts ("three basil leaves" becomes "roughly three"). Describe the feel you want, not a precise inventory.
The honest limits — and the trustworthy path
Here’s the part most prompt guides skip. A text-to-image model can fabricate a dish you never cooked. For a real menu, that’s a problem: the image won’t match what lands at the customer’s door, which is both a trust issue and, increasingly, a policy issue on delivery platforms.
That’s exactly why FoodPhoto.ai takes the enhancement path rather than pure generation: you photograph your real dish, then brief the look — lighting direction, background, mood, crop — and the tool improves the real photo without changing the food. The brief-writing skill above applies directly to directing that enhancement: you still specify light, angle, and mood, but the dish stays honest. FoodPhoto begins with two previews on your own dish, with a verified account and no card. Free previews are significantly slower than paid plans and are prepared in a separate queue: about 30–35 seconds in normal conditions, and longer when the service is busy or the edit is complex. Keep the chat open and do not repeat the request while it processes. See the current plans and usage estimates for photos, menus and campaigns.
If you’re moving an entire menu in-house, our guide to replacing recurring restaurant photographers with an AI system covers the full workflow, and our menu photo composition rules cover the framing decisions the prompts assume.
Write the brief like a photographer, direct the enhancement of a real photo, and you get menu-ready images that are both polished and true.
Enhance your real food photos in FoodPhoto.ai
FAQ
What makes a good AI food photography prompt?
A good prompt reads like a photographer’s brief: it names the subject and its state, the lighting direction and quality, the camera angle, the lens character, the styling, and the mood. Vague prompts like ‘professional food photo’ make the model fall back on a generic average. Specific, ordered direction produces specific results.
What’s the single most useful detail to add to a food prompt?
Lighting direction and lens character. Specifying where the light comes from (for example, soft window light from camera left) and a focal length (such as an 85mm lens at f/2.2) does more to make food look real and intentional than any other single instruction.
Can AI generate a photo of a dish I haven’t cooked?
Text-to-image models can fabricate a dish, but that’s risky for a real menu — the image won’t match what arrives, which is a trust and policy problem. FoodPhoto.ai takes the honest path: you photograph your real dish and brief the enhancement (lighting, background, mood), so the result is your actual food, improved.
What are the limits of AI food imagery?
AI mangles text and logos, ignores exact garnish counts, and can drift toward a generic look without direction. For honest menus, the bigger limit is fabrication itself — which is why enhancing a real photo of the real dish is the trustworthy approach.