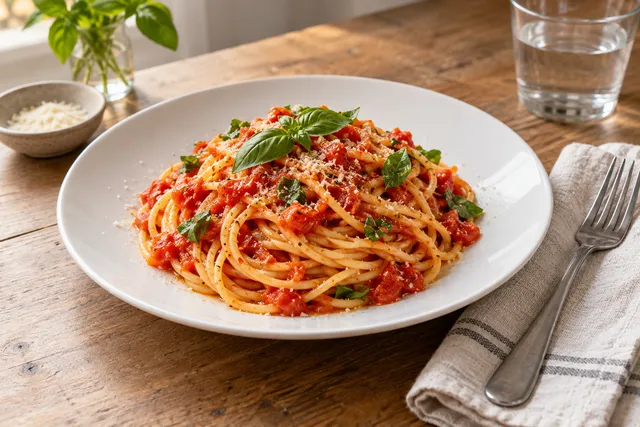
When approved restaurant photos are scattered across phones, chats, cloud drives, and delivery dashboards, the problem is not simply storage. It is retrieval, trust, and control. A usable restaurant photo asset library gives every team member one clear place to find the current image, understand where it can be used, confirm who approved it, and replace it when the dish or offer changes. Start with a simple folder structure, descriptive filenames, a small metadata record, an approval owner, rights notes, version numbers, and review dates. Then make the library part of your weekly menu and marketing routine.
The short answer
A restaurant photo asset library should answer five questions immediately:
- What is this image?
- Is it approved and current?
- Where can we use it?
- Who owns the decision?
- When should we review or retire it?
You do not need an expensive digital asset management platform to begin. A well-structured shared drive, a spreadsheet or database index, and a short operating rule can work for a small restaurant team. The important part is consistency. A library that is easy to search but full of obsolete or unapproved images will still waste time and create avoidable mistakes.
Why scattered photos become an operating problem
Restaurant images often accumulate through daily work. A manager takes a phone photo for a menu update. A designer receives a better crop in a chat. A delivery-platform coordinator downloads a compressed version. A chef keeps the original on a personal device. Someone later asks for “the latest pasta photo,” and nobody is sure which file that means.
This creates several risks:
- Staff publish an old recipe, garnish, portion, or package.
- A delivery listing uses a crop that hides the main ingredients.
- Social, website, and marketplace images look inconsistent.
- A team member spends time recreating an asset that already exists.
- Rights or permission information is lost with the original file.
- Seasonal images remain visible after the promotion has ended.
The answer is not to save every image forever. It is to make the status and intended use of each useful image clear.
Define the library before creating folders
First decide what belongs in the library. Keep the scope practical. A small restaurant may need only six asset groups:
- Core menu dishes
- Drinks, sides, desserts, and add-ons
- Delivery and packaging images
- Venue, team, and local business images
- Seasonal, promotional, and limited-time offers
- Working files and retired assets
Separate “approved for use” from “being edited.” This prevents a draft from accidentally becoming the image used on a menu or ordering page.
A useful top-level structure could look like this:
Restaurant Photo Library/
├── 01_Approved/
│   ├── Core Menu/
│   ├── Delivery Packaging/
│   ├── Drinks Sides Desserts/
│   ├── Venue Team/
│   └── Campaigns Seasonal/
├── 02_In Review/
├── 03_Source Originals/
├── 04_Exports/
│   ├── Website/
│   ├── Delivery Platforms/
│   ├── Social/
│   └── Print/
├── 05_Rights Approvals/
└── 06_Retired/
The numbered folders keep the workflow understandable when people browse manually. If your storage tool supports labels, use labels for status and channel as well, but do not rely on labels alone. Shared folders are easier for casual collaborators to understand.
Use filenames that explain the asset
A filename should carry enough information to distinguish one asset from another without opening it. Avoid names such as IMG_4821.jpg, final-final.png, or new burger.jpg.
Use a predictable pattern:
location-dish-variant-channel-date-version.ext
Examples:
soho-chicken-katsu-core-menu-2026-07-v01.jpgcentral-iced-latte-delivery-2026-07-v02.jpgriverside-family-meal-social-2026-07-v01.jpg
Use lowercase, hyphens, and a date format that sorts correctly. Keep the location segment optional for a single-site restaurant, but make it mandatory if several locations share the library. Use a short controlled vocabulary for channels, such as website, delivery, social, print, and ads.
Version numbers are especially useful when the subject stays the same but the crop, background, or composition changes. Do not overwrite the only approved file with a new edit. Preserve the original and create a new version.
For a deeper naming workflow, see the restaurant menu photo file naming convention.
Add a lightweight metadata record
The filename is not enough. Create an index in a spreadsheet, table, or asset-management tool. Each row should represent an asset or an approved image set.
| Field | What to record | Example |
|---|---|---|
| Asset ID | Stable internal reference | DISH-014 |
| Display name | Customer-facing dish name | Classic Chicken Katsu |
| Location | Restaurant or branch | Soho |
| Category | Menu, drink, venue, campaign | Core menu |
| Status | Draft, review, approved, retired | Approved |
| Version | Current approved version | v02 |
| Allowed channels | Where it may be published | Website, delivery, social |
| Source | Original photo or enhancement source | Phone photo, July shoot |
| Owner | Person responsible for approval | General manager |
| Rights note | Permission or license details | Staff-owned, permission confirmed |
| Dish check date | Date the image was compared with the real dish | 2026-07-25 |
| Review date | Next planned review | 2026-10-01 |
| Expiry | Required retirement date, if applicable | 2026-08-31 |
Keep metadata factual. If the image is an enhanced version of a real dish photo, record that. If an image is for internal concept work only, mark it clearly and keep it out of the approved folder.
For search visibility, write useful alt text separately from the filename. Alt text should describe what the image shows, not repeat a string of keywords. The guide to restaurant alt text and menu image SEO covers that distinction.
Create an approval rule people will actually follow
Approval should be clear enough to complete during a normal shift. Assign one accountable owner for each location or menu group. That person does not need to do every edit; they do need to confirm that the image represents the product and is suitable for its intended channel.
A simple approval sequence is:
- Upload the original to
03_Source Originals. - Create or edit the working image in
02_In Review. - Compare the image with the current dish, packaging, garnish, and portion.
- Check the crop, lighting, text overlays, and channel requirements.
- Record the decision and date in the index.
- Move the approved version into the relevant
01_Approvedfolder. - Export channel-specific versions without changing the approved master.
Use a visible status vocabulary: draft, in review, approved, approved with restrictions, and retired. “Approved with restrictions” might mean website and social use are allowed, but delivery use is not because the crop or packaging does not match that channel.
Approval checklist
Before an image moves into the approved library, confirm:
- The dish, drink, package, or venue shown is real and current.
- Ingredients and visible toppings match the menu description.
- Portion size and presentation are reasonably representative.
- The location or brand context is correct.
- The crop works for the intended channel.
- No accidental customer, staff, license plate, or private information appears.
- Any enhancement preserves the identity of the real product.
- Image rights or permissions are recorded.
- The approver and approval date are recorded.
- Review or expiry dates are set.
Track rights and permissions separately
Rights information is easy to lose because it usually lives in messages or invoices. Create one rights record for every externally supplied image and any photo containing identifiable people, artwork, branded packaging, or third-party content.
Record who created the image, who supplied it, what permission was granted, permitted channels, geographic limits if relevant, and any end date. Keep contracts, invoices, releases, and written permissions in 05_Rights Approvals, then link the record to the asset ID.
For staff phone photos, agree in writing whether the restaurant can use, edit, archive, and publish the images after the staff member leaves. For photographer or agency work, check whether the license covers website, print, paid advertising, delivery platforms, and future edits. If you are unsure, treat the asset as restricted until someone confirms the rights.
Separate masters, exports, and platform copies
Your approved master should be the cleanest reusable version, with no platform-specific text or destructive compression. Exports are copies made for a purpose. A delivery platform may require a different crop or file size than your website, while a social post may need extra space for a caption or design element.
Keep exports connected to the master through the asset ID and version. For example:
- Master:
soho-chicken-katsu-core-menu-2026-07-v02.tif - Website export:
soho-chicken-katsu-website-2026-07-v02.jpg - Delivery export:
soho-chicken-katsu-delivery-2026-07-v02.jpg
Check current requirements for each marketplace before exporting or uploading. Platform rules, accepted formats, image dimensions, and review practices can change. Do not assume that a file accepted last year is still the best or permitted version today.
Use honest enhancement and preserve product truth
A useful enhancement workflow can correct uneven light, distracting backgrounds, poor crop, and inconsistent presentation while keeping the actual dish recognizable. That is different from creating an image of food that the restaurant does not serve.
When improving phone photos, keep a comparison with the original. This makes review easier and helps the approver confirm that the edit has not changed the key ingredients, portion, color, or texture in a misleading way. Avoid edits that add ingredients, remove important allergens, exaggerate portion size, or show packaging the customer will not receive.
FoodPhoto.ai is designed for this type of workflow: upload real dish or phone photos, improve the light and background, create a consistent crop, and export menu-ready images. The restaurant team should still approve the result against the real product.
Add versioning and expiry rules
Versioning answers “which edit is current?” Expiry answers “should we still use it?” Both matter.
Create a new version when the dish presentation, recipe, packaging, crop, background, or channel use changes. Retire the old approved version rather than deleting it immediately. Move it to 06_Retired, record the replacement asset ID, and note the reason.
Use expiry dates for:
- Limited-time dishes
- Seasonal menus
- Holiday campaigns
- Price-led promotions
- Temporary packaging
- Staff or venue images that may no longer be current
- Delivery images tied to a specific menu configuration
A quarterly review is a useful baseline for core assets. Review sooner whenever the menu, recipe, supplier, packaging, or brand identity changes. Your restaurant photo refresh calendar can help turn this into a recurring schedule.
Make the library part of weekly operations
A library fails when it is treated as a one-time cleanup project. Add a short photo review to an existing weekly meeting or manager checklist. The review can take 15 minutes:
- Check new images awaiting approval.
- Confirm the current version for dishes changed that week.
- Retire expired campaign assets.
- Record missing photos for upcoming menu or packaging changes.
- Confirm that the website and ordering channels are using approved exports.
A recurring weekly restaurant photo sprint can combine this review with a small number of new captures or enhancements. Keep the scope narrow. Updating three important assets consistently is more useful than creating a large backlog nobody can approve.
A simple rollout for a small restaurant team
If your current library is chaotic, do not try to perfect every historical photo first. Start with the assets that affect sales and daily operations.
Day 1: Gather
Collect current menu, delivery, website, social, and venue images. Copy originals into a protected source folder. Do not rename or overwrite the originals until you have a backup.
Day 2: Sort
Separate likely current assets, uncertain assets, and clearly obsolete assets. Put uncertain files into review rather than guessing.
Day 3: Index
Create records for the current menu and highest-use assets. Add owners, channels, rights notes, versions, and review dates.
Day 4: Approve
Compare the most important images with the dishes and packaging currently being served. Enhance or re-export only where there is a clear need.
Day 5: Publish and maintain
Replace outdated channel images, link exports to their masters, and schedule the next review. Add the new rules to the manager or marketing checklist.
What a usable library looks like after setup
A team member should be able to search for a dish, find the current approved master, see where it can be used, confirm its rights, download the right export, and know when it needs review without asking three other people. That is the practical test.
If the library still depends on one person remembering which chat contains the correct photo, simplify the structure. Reduce folder depth, standardize the filename pattern, and make the approval owner visible. Good governance should reduce questions, not create a new administrative burden.
For a broader workflow, connect the library to your restaurant menu photo SOP. The SOP can define how images are captured and checked; the asset library defines how approved files are stored, found, reused, and retired.
Final takeaway
A restaurant photo asset library is a small operational system, not just a folder of pictures. Build it around approved real products, descriptive filenames, searchable metadata, rights records, channel-specific exports, version control, and expiry dates. Keep the process lightweight enough for a small team to maintain every week.
If you already have real dish photos that need more consistent light, background, crop, or presentation, try a FoodPhoto.ai pack and add the approved outputs to your library. Visit the pricing page to choose a workflow for a menu refresh or test a small set of priority dishes first.
FAQ
What should a restaurant photo asset library contain?
It should contain approved dish, menu, venue, team, promotional, and delivery-platform images, along with filenames, metadata, rights information, approval status, source files, export versions, and review or expiry dates.
How should restaurant food photos be named?
Use a consistent structure such as location-dish-variation-channel-date-version.ext. For example, downtown-burger-classic-delivery-2026-07-v02.jpg. Keep names descriptive, searchable, and free from unnecessary spaces or vague labels.
How often should restaurant photos be reviewed?
Review core menu images whenever recipes, plating, prices, or packaging change. Run a broader library review at least quarterly, and set earlier expiry dates for seasonal offers, limited-time products, and campaign assets.
Can FoodPhoto.ai organize and improve existing restaurant photos?
FoodPhoto.ai can enhance real dish or phone photos by improving light, background, crop, and consistency, then export menu-ready images. The result should represent the actual dish rather than inventing a different product.
Next step
Choose one real dish photo, enhance it, and compare the before/after at delivery-app thumbnail size. If it still looks like the dish your kitchen serves, use the same standard across the rest of your menu.